Top speed / boost
272 / 367 m/s
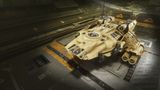
The Type-11 Prospector pairs dedicated mining-tool hardpoints and exclusive Mk II modules with an oversized class-7 power distributor, real shields and genuine speed. It gives up some raw hold size to the large barges, but its sustained tool output, survivability in hot rings and medium-pad reach make it faster, safer and more efficient per session than anything else. If mining is the mission, this is the ship.
This ship's 1–100 suitability rating reflects its fully-engineered fit for this role, scored against every ship in the role. See how ships are rated.
Every other 'mining ship' is really a freighter or multirole with mining tools bolted on. The Type-11 Prospector is different: Lakon designed it from the keel up for one job. Its hardpoints are dedicated mining mounts, it accepts the exclusive Mk II mining modules unavailable to other hulls, and its specification — an outsized class-7 power distributor, strong shields, genuine speed — reads like a mining engineer's wish list.
The class-7 distributor is the headline. Mining tools are distributor-hungry, and most miners throttle their lasers to avoid browning out; the Type-11 simply doesn't, sustaining full tool output continuously. Add medium-pad access, real shielding and a turn of speed that lets it work and survive in high-yield rings, and you have a ship that mines faster, safer and longer than any barge — even if its hold is smaller.
Efficient, sustained mining of any type — laser, core, sub-surface — in high-value rings, including hotter systems where a Type-9 would be prey. The premium, do-it-properly mining platform.
Four things make the Type-11 the purpose-built mining apex:
The Type-9 and Imperial Cutter haul far more ore per trip, so for pure volume-per-session in a safe ring a barge still wins on tonnage. The Type-11's answer is everything else: it mines faster, survives hotter rings, sustains its tools without throttling and reaches more markets. It is the best miner, even if it isn't the biggest bucket.
The only purpose-built miner — exclusive Mk II tools, a class-7 distributor that never throttles, and medium-pad reach — capped only by a hold the big barges easily out-haul.
The 95/100 headline is a verdict against the mining role's priority-ordered factors. Each factor carries a weight (its share of 100); this hull earns part of each based on how it performs against the whole field. The points sum to the rating.
| Role factor | Score | Why this score |
|---|---|---|
| Effective ore capacity | 32/35 | A mining fit reaches ~256+ t engineered (three size-6 racks plus a size-5), productive but below the big barges' ~790 t; the class-7 distributor sustains tools continuously, so ore-per-minute leads the field even with a smaller hold. |
| Tool & slot fit | 25/25 | Dedicated mining-only hardpoints (Large 1, three medium, two small) plus exclusive Mk II tools no other hull can fit, 4 utility mounts for the Pulse Wave Analyser and boosters, and an oversized class-7 distributor that runs every tool flat-out without throttling. |
| Survivability | 14/15 | ~275 MJ base shield rising past 600 MJ engineered with a 5C bi-weave and two Heavy-Duty boosters, plus 350 armour and 367 m/s boost let it tank pirate fire and flee hot rings — far tougher than a Type-9, short of a Cutter. |
| Pad class & access | 15/15 | Medium pad docks at far more stations than the large-pad barges (Type-9, Cutter, Anaconda), shortening market runs and widening selling options — best-in-class access for the role. |
| Cost & specialisation | 9/10 | ~66M Cr hull (~100M+ engineered) with no rank or permit gate — pure credits — and a mining fit that skips combat engineering; pricey versus a Type-9 but the only purpose-built dedicated miner, so specialisation is total. |
| Weighted total | 95/100 | Matches the headline suitability rating for this ship in this role. |
Weights are an editorial decomposition of the role's stated priority order — not an in-game formula. Bar length shows how fully each factor is earned; the longest factors carried the score, the shortest are where it gave points away. See how ships are rated.
Both tables rate ships for the mining role specifically. The role column is approximate maximum cargo — one input to mining value alongside speed, shields and tool sustain, where the Type-11 leads.
| Ship | Class | Max cargo (t) | Pros & cons vs Type-11 Prospector | Rating |
|---|---|---|---|---|
| Type-11 Prospector this | Medium | ~288 | — this hull (baseline) | 95 |
| Python | Medium | ~294 | Mines, fights and flees; flexible all-rounderNo dedicated mounts; throttles tools on its smaller distributor | 90 |
| Type-8 Transporter | Medium | ~406 | Bigger hold; cheaper; medium-padFreighter at heart; weaker shields; no mining mounts | 84 |
| Krait Phantom | Medium | ~190 | Long-legged; roomy; sleekSmall hold; general-purpose | 70 |
| Keelback | Medium | ~98 | Cheap entry miner with an SLFTiny hold; a starter only | 68 |
| Asp Explorer | Medium | ~130 | Cheap; flexible; can also exploreSmall hold; no mining specialisation | 64 |
Among medium miners the Type-11 is in a class of its own — the only purpose-built option, and the only one that sustains full tool output. The Python is the flexible runner-up and the Type-8 the budget-volume choice, but for serious mining the Type-11's dedicated design wins decisively.
| Ship | Class | Max cargo (t) | Pros & cons vs Type-11 Prospector | Rating |
|---|---|---|---|---|
| Imperial Cutter | Large | ~794 | Enormous hold and shields; survives anythingImperial Duke rank; very costly; large pad | 92 |
| Type-9 Heavy | Large | ~790 | Vast cheap hold; longest sessions in safe ringsFragile and slow; needs solo/escort; large pad | 90 |
| Anaconda | Large | ~470 | Big hold; mines and defends itselfLarge pad; ponderous; no mining specialisation | 86 |
| Federal Corvette | Large | ~618 | Mines and destroys any pirate presentFederal rank; overkill; large pad | 64 |
The big barges out-haul the Type-11 on tonnage per trip, but all need a large pad and either a rank grind (Cutter, Corvette) or careful safety management (Type-9). The Type-11 trades some cargo for speed, shields, sustained tools and medium-pad reach — the better choice for active, efficient mining rather than slow bulk hauling.
At ~66M Cr the Type-11 is a premium purchase, but it carries no rank or permit gate — just credits. For a dedicated miner the price buys capability you cannot get elsewhere: sustained tools, dedicated mounts and survivability in one hull.
A mining fit avoids costly combat engineering, so the all-in figure is dominated by the hull and the Mk II mining kit. Given how fast a well-run session fills a hold with high-value ore, it repays the investment quickly for anyone who mines regularly.
The Type-11 costs more than a Type-9, but its sustained tools and ability to work hot rings mean higher yield per hour and fewer interrupted sessions — the price difference pays back fast for an active miner.
A dedicated mining fit built around sustained tool output and survivability. Initial is a working laser-mining starter; A-Rated is the efficient all-method baseline; Engineered tunes the cores and shield. The mining tools themselves carry no blueprints, but the class-7 distributor lets them run flat-out.
| Slot | Initial · buy-only | A-Rated · no eng | Engineered | Notes |
|---|---|---|---|---|
| Hardpoints | ||||
| Large 1 | 3C Mining Volley Repeater (Fixed) | 3C Mining Volley Repeater (Fixed) | (No blueprint available) | The Type-11's signature large mining tool — primary continuous laser-mining output; mining tools carry no engineering. |
| Medium 1 | 2D Mining Laser (Fixed) | 2D Mining Laser (Fixed) | (No blueprint available) | Medium mining laser for added sustained laser extraction; not engineerable. |
| Medium 2 | — | 2B Seismic Charge Launcher (Fixed) | (No blueprint available) | Seismic Charge Launcher cracks motherlode rocks for core mining; no blueprint exists. |
| Medium 3 | — | 2B Sub Surface Displacement Missile (Fixed) | (No blueprint available) | Sub-surface Displacement Missile pulls embedded deposits; mining tools aren't engineered. |
| Small 1 | — | 1D Abrasion Blaster (Fixed) | (No blueprint available) | Abrasion Blaster strips surface deposits off rocks; not engineerable. |
| Small 2 | — | 1B Sub Surface Displacement Missile (Fixed) | (No blueprint available) | Small sub-surface missile adds a second extraction mount; no blueprint. |
| Small 3 | — | 1D Mining Laser (Fixed) | (No blueprint available) | |
| Small 4 | — | 1D Mining Laser (Fixed) | (No blueprint available) | |
| Utility Mounts | ||||
| Utility 1 | 0E Pulse Wave Analyser | 0A Pulse Wave Analyser | (No blueprint available) | A-rated Pulse Wave Analyser lights up mineable and core-bearing rocks at a glance. |
| Utility 2 | — | 0A Shield Booster | G5 Heavy Duty + Super Capacitors | Heavy-Duty shield booster multiplies the bi-weave's MJ to tank pirate fire while you escape. |
| Utility 3 | — | 0I Heat Sink Launcher | G1 Ammo Capacity (no experimental effect) | Optional / low-priority — Ammo Capacity adds heat-sink charges. Dumps heat for silent running and Thermal-Vent resets. |
| Utility 4 | — | 0A Shield Booster | G5 Heavy Duty + Super Capacitors | Second Heavy-Duty booster — a cheap, large gain in shield strength for hot rings. |
| Core Internals | ||||
| Bulkheads | Lightweight Alloy | Lightweight Alloy | G5 Lightweight (no experimental effect) | |
| Power Plant | 6E Power Plant | 6A Power Plant | G5 Low Emissions + Thermal Spread | A-rated for the tool, limpet, refinery and shield load; Low Emissions keeps the signature low at busy rings. |
| Thrusters | 5E Thrusters | 5A Thrusters | G5 Dirty Drive Tuning + Drag Drives | A-rated + Dirty Drives for the speed to work a ring and outrun pirates. |
| Frame Shift Drive | 5E Frame Shift Drive | 5A Frame Shift Drive | G5 Increased Range + Mass Manager | A-rated + Increased Range shortens laden runs to the best market. |
| Life Support | 3E Life Support | 3D Life Support | G5 Lightweight (no experimental effect) | D-rated to save mass; Lightweight trims more — life support has no experimental effect. |
| Power Distributor | 7E Power Distributor | 7A Power Distributor | G3 Charge Enhanced + Super Conduits | The class-7 heart — A-rate it so the tools never throttle; Charge Enhanced refills the reservoir faster. |
| Sensors | 3E Sensors | 3D Sensors | G5 Lightweight (no experimental effect) | D-rated and Lightweight; mining needs no sensor range, so save the mass. |
| Fuel Tank | 5C Fuel Tank | 5C Fuel Tank | (No blueprint available) | Stock C tank; fuel capacity is fixed and cannot be engineered. |
| Optional Internals | ||||
| Size 6 | 6E Cargo Rack | 6E Cargo Rack | G5 Expanded Capacity (no experimental effect) | Optional — Expanded Capacity adds cargo space; worth it for dedicated haulers. Holds cargo. |
| Size 6 | 6E Cargo Rack | 6E Cargo Rack | G5 Expanded Capacity (no experimental effect) | Optional — Expanded Capacity adds cargo space; worth it for dedicated haulers. Holds cargo. |
| Size 6 | 6E Cargo Rack | 6E Cargo Rack | G5 Expanded Capacity (no experimental effect) | Optional — Expanded Capacity adds cargo space; worth it for dedicated haulers. Holds cargo. |
| Size 5 | — | 5E Cargo Rack | G5 Expanded Capacity (no experimental effect) | Optional — Expanded Capacity adds cargo space; worth it for dedicated haulers. Holds cargo. |
| Size 5 | — | 5C Bi-Weave Shield Generator | G5 Reinforced + Hi-Cap | Bi-weave regenerates fast under fire — Reinforced + Hi-Cap to work hot rings safely. |
| Size 5 | 3E Collector Limpet Controller | 5A Collector Limpet Controller | G5 Lightweight (no experimental effect) | Optional / low-priority — Lightweight trims the controller's mass. Deploys collector limpets. |
| Size 4 | 4E Refinery | 4A Refinery | G5 Shielded (no experimental effect) | Optional / low-priority — Shielded hardens the refinery. Processes mined fragments. |
| Size 3 | — | 3A Collector Limpet Controller | G5 Lightweight (no experimental effect) | Optional / low-priority — Lightweight trims the controller's mass. Deploys collector limpets. |
| Size 2 | — | 1A Collector Limpet Controller | G5 Lightweight (no experimental effect) | Optional / low-priority — Lightweight trims the controller's mass. Deploys prospector limpets. |
| Size 1 | 1E Prospector Limpet Controller | 1A Prospector Limpet Controller | G5 Lightweight (no experimental effect) | Optional / low-priority — Lightweight trims the controller's mass. Deploys prospector limpets. |
| Size 1 | 1I Detailed Surface Scanner | 1I Detailed Surface Scanner | G5 Expanded Probe Scanning Radius (no experimental effect) | Optional / low-priority — Expanded Probe Scanning widens probe coverage. Maps planets for exploration data. |
| Open in planner / Export | ||||
| Open in Coriolis | open | open | open | One-click open at coriolis.io. |
| Open in EDSY | open | open | open | One-click open at edsy.org. |
| Copy SLEF | Copies the raw Ship Loadout Export Format for that state. | |||
The class-7 distributor means you never throttle the tools — fit the full mining suite and run it continuously. Balance collector controllers (throughput) against a couple of prospectors (yield), and keep the bi-weave for working hot rings.
Buy the hull and fit the signature 3C Mining Volley Repeater to the large mount and a 2D Mining Laser to a medium mount — laser extraction works from session one. Add a 0E Pulse Wave Analyser utility to spot mineable and core-bearing rocks instantly.
Round out the working kit buy-only: three 6E Cargo Racks, a 4E Refinery, and one Collector and one Prospector Limpet Controller. Thanks to the class-7 distributor you can run the lasers continuously from the first session. The hull ships with stock Lightweight Alloy bulkheads — no armour purchase needed; a dedicated miner trades plating for mass.
The core, sub-surface and abrasion mounts, the two spare size-1 hardpoints, the bi-weave shield, the shield boosters and the extra limpet controllers all stay empty until the A-rating pass — the buy-only fit is a pure laser-mining starter.
A-rating priority for a dedicated miner — the distributor is already large, so protect sustain and transit:
Even though the Type-11's distributor is oversized, A-rating it guarantees full uninterrupted tool output — the single biggest factor in its class-leading yield.
With the core A-rated, finish the tool fit: drop a 2B Seismic Charge Launcher, a 2B Sub-Surface Displacement Missile and a 1D Abrasion Blaster into the spare mounts for core mining, and fill the last two size-1 hardpoints with extra 1D Mining Lasers — three lasers firing at once lift the laser-extraction rate. Replace the redundant second 1A Prospector controller with a 1A Collector Limpet Controller: the controller family skips size 2, so the size-2 optional slot can only hold a size-1 unit either way — spend it on collector throughput and keep one 1A Prospector in the size-1 slot. Leave the stock Lightweight Alloy bulkheads as-is; a miner does not up-armour.
Mining engineering on the Type-11 is about sustain, transit and survivability. Mk II mining tools aren't engineered; the cores and shield are. Pin blueprints for remote G1→G5 application.
| Module | Blueprint | Experimental | Engineer |
|---|---|---|---|
| Power Distributor (7) | Charge Enhanced (G3) | Super Conduits | The Dweller |
| Thrusters (5) | Dirty Drive Tuning (G5) | Drag Drives | Professor Palin / Mel Brandon |
| Frame Shift Drive (5) | Increased Range (G5) | Mass Manager | Felicity Farseer |
| Power Plant (6) | Low Emissions (G5) | Thermal Spread | Hera Tani |
| Bi-Weave Shield (5) | Reinforced (G5) | Hi-Cap | Lei Cheung |
| Shield Boosters | Heavy Duty (G5) | Super Capacitors | Didi Vatermann |
| Bulkheads | Lightweight (G5) | — | Selene Jean |
Moderate — core and shield blueprints only, no weapon grind. Thruster and FSD G5 are the demanding ones. With a complete material inventory this is engineering-spend rather than farming. Ask for exact per-blueprint counts if needed.
Approximate progression across the three states (figures are representative, not exact rolls):
| Stat | Initial | A-rated | Engineered |
|---|---|---|---|
| Top speed (boost) | 367 m/s | 367 m/s | ~430 m/s |
| Jump range (laden) | ~22 LY | ~30 LY | ~42 LY |
| Shield (MJ) | ~275 | ~420 | ~620 |
| Mining lasers | 1 | 3 | 3 |
| Tool sustain | continuous | continuous | continuous |
| Cargo (mining fit) | ~160 t | ~224 t | ~256+ t |
Engineering lifts boost past 420 m/s, more than doubles shields and extends laden range for market runs — while the class-7 distributor keeps the Mk II tools running flat-out at every stage, now driving three mining lasers and the Volley Repeater alongside the core-charge trio. The stock Lightweight Alloy bulkheads are kept light — mass-shaved by engineering rather than up-armoured — so laden jump range stays the priority. The result is the fastest, safest, most sustained mining platform in the game.
Any ringed body with a mineral hotspot suits it; the Type-11's survivability means you can chase the richest hotspots even in busier systems. Sell at the nearest high-price market — medium-pad access usually means a station within a jump or two.
The Type-11 Prospector is the apex of dedicated mining: the only purpose-built miner, with exclusive Mk II tools, a distributor that sustains them indefinitely, and the speed and shields to work the richest rings safely. Barges out-haul it on tonnage, but nothing matches it for yield-per-hour, survivability and reach. If mining is your trade, this is the ship built for you.
Figures on this page are verified against the sources below.