Ore hold (practical)
~50–70 t
 E:D Black Box
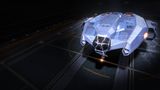
A cheap Lakon hull with one real trick: a ship-launched fighter bay unique at its price. Ore hold is small — the fighter hangar, refinery and limpet controllers crowd out cargo — so per-trip hauls are modest and throughput is poor. The Keelback earns its place only if cheap SLF defence is the specific appeal.
This ship's 1–100 suitability rating reflects its fully-engineered fit for this role, scored against every ship in the role. See how ships are rated.
Mining makes you a sitting target, and the Keelback's answer is unusual for so cheap a ship: a ship-launched fighter bay. The same combat-capable Type-6 derivative that hauls cargo makes a budget miner that, when a pirate interdicts you mid-session, can deploy an SLF (flown by you, a crewmate or an NPC) to drive the attacker off — rather than simply dying laden in the ring.
Its ore hold is small — around 98 tonnes — because slots go to the fighter bay, refinery and limpet controllers, so per-trip hauls are modest. As pure mining throughput it's poor value. But for a budget commander who wants a cheap miner with genuine self-defence, or who enjoys the SLF mechanic, the Keelback offers something no other low-cost miner does: the ability to fight back without a Python's price tag.
Defended budget mining: cheap laser mining in pirate-prone rings with an SLF for protection, crewed mining where a friend flies the fighter, and a versatile cheap hull that mines, hauls or fights a little.
Four things define the Keelback as a miner:
Its ore hold is small — the fighter bay, refinery and limpets leave little room for cargo — so per-trip hauls are modest and throughput is low. The fighter needs crew or NPC piloting to defend you while you mine. As mining volume per credit it's poor; the Keelback only makes sense if the cheap SLF defence specifically appeals.
A unique sub-3M Cr fighter bay and medium-pad, rank-free access lift a defensible, accessible miner — but a ~98 t hull (~70 t practical) caps it at niche throughput.
The 68/100 headline is a verdict against the mining role's priority-ordered factors. Each factor carries a weight (its share of 100); this hull earns part of each based on how it performs against the whole field. The points sum to the rating.
| Role factor | Score | Why this score |
|---|---|---|
| Effective ore capacity | 15/35 | Max cargo is only ~98 t and the fighter bay, refinery and twin limpet controllers eating the 5/5/4/3/2/2/1 optionals drop practical ore to ~50-70 t (engineered ~70 t) — near the bottom of the field against the Python's ~294 t, Type-8's ~406 t and even the Krait Mk II's ~230 t. |
| Tool & slot fit | 19/25 | Four tool mounts (2M + 2S) carry two mining lasers, a sub-surface displacement missile and an abrasion blaster, with 3 utilities for a pulse wave analyser plus refinery, collector and prospector controllers — a complete mining suite, but the size-5-capped optionals force it to compete with the fighter hangar and bi-weave for space. |
| Survivability | 13/15 | A ship-launched fighter bay (5D hangar) is unique at this price tier among miners — an SLF drives off pirates that kill laden haulers — backed by a 3C bi-weave plus 0A shield booster and a hull tougher than the Type-6 it derives from. Role-leading defence among budget miners. |
| Pad class & access | 13/15 | Medium pad fits most stations, with no rank gate and no permit — open to any commander. Only the large-pad Type-11 and Type-7 alternatives trade that access away for bigger holds. |
| Cost & specialisation | 8/10 | At ~2.95M Cr hull (~12M all-in) it is the cheapest miner with genuine self-defence and rank-free, but ore-per-credit is rated poor across all three states — cheapness is the strength, throughput specialisation the weakness. |
| Weighted total | 68/100 | Matches the headline suitability rating for this ship in this role. |
Weights are an editorial decomposition of the role's stated priority order — not an in-game formula. Bar length shows how fully each factor is earned; the longest factors carried the score, the shortest are where it gave points away. See how ships are rated.
Every table rates ships for mining specifically, split by landing-pad class. The Max cargo column is maximum ore-hold tonnage; the rating is the same 1–100 suitability verdict used across the site.
| Ship | Class | Max cargo | Pros & cons | Rating |
|---|---|---|---|---|
| Type-11 Prospector | Medium | ~288 t | Higher-rated; tool fit; pad accessValue | 95 |
| Python | Medium | ~294 t | Higher-rated; tool fit; survivabilityOre hold | 90 |
| Krait Mk II | Medium | ~230 t | Higher-rated; survivability; pad accessOre hold | 84 |
| Type-8 Transporter | Medium | ~406 t | Higher-rated; ore hold; tool fitSurvivability | 84 |
| Krait Phantom | Medium | ~190 t | Higher-rated; pad access; tool fitSurvivability | 70 |
| Corsair | Medium | ~318 t | Survivability; pad accessValue | 68 |
| Keelback this | Medium | ~98 t | — this hull (baseline) | 68 |
| Asp Explorer | Medium | ~130 t | Tool fit; pad accessLower-rated; survivability | 64 |
| Type-6 Transporter | Medium | ~114 t | Value; pad accessLower-rated; survivability | 62 |
9 medium-pad mining hulls carry a rating, led by Type-11 Prospector (95). Every same-pad rival lands where this one does — the direct field to shop.
| Ship | Class | Max cargo | Pros & cons | Rating |
|---|---|---|---|---|
| Imperial Cutter | Large | ~794 t | Higher-rated; tool fit; survivabilityPad access | 92 |
| Type-9 Heavy | Large | ~790 t | Higher-rated; ore hold; valueSurvivability | 90 |
| Anaconda | Large | ~470 t | Higher-rated; tool fit; survivabilityPad access | 86 |
| Type-7 Transporter | Large | ~310 t | Higher-rated; value; tool fitSurvivability | 78 |
| Panther Clipper Mk II | Large | ~662 t | Higher-rated; ore hold; tool fitValue | 77 |
| Imperial Clipper | Large | ~250 t | Higher-rated; value; survivabilityPad access | 70 |
| Type-10 Defender | Large | ~534 t | Higher-rated; survivability; tool fitValue | 70 |
| Federal Corvette | Large | ~618 t | Survivability; ore holdLower-rated; value | 64 |
| Caspian Explorer | Large | ~434 t | Tool fit; survivabilityLower-rated; value | 60 |
The large-pad mining field (9 rated), led by Imperial Cutter (92) — bigger pads and bankrolls. They out-muscle this hull on the numbers, but sit a pad class away.
| Ship | Class | Max cargo | Pros & cons | Rating |
|---|---|---|---|---|
| Cobra Mk V | Small | ~110 t | Pad access; tool fitLower-rated; ore hold | 58 |
| Cobra Mk III | Small | ~64 t | Pad access; valueLower-rated; survivability | 52 |
| Adder | Small | ~30 t | Pad access; valueLower-rated; survivability | 48 |
The small-pad mining field (3 rated), led by Cobra Mk V (58) — cheaper hulls and tighter pads. They undercut this hull on the numbers, but sit a pad class away.
At ~2.95M Cr the Keelback is cheap, with no rank gate, though the fighter bay, hangar and SLF add to the fit. The all-in cost lands around 12M Cr with a defended mining build.
It's a niche-and-novelty pick. For mining volume the cheaper Type-8 (or even a Type-7) holds far more; the Keelback makes sense only if the cheap fighter-bay defence specifically appeals.
Around 12M Cr for a budget miner that launches a fighter to fight off pirates — a fun niche, but the hold is small and bigger miners cost less per tonne.
A defended budget mining fit built around the fighter bay. Initial is buy-only; A-rated is the mining baseline; Engineered targets the ship's defence and mobility — the mining tools are deliberately left stock.
| Slot | Initial · buy-only | A-Rated · no eng | Engineered | Notes |
|---|---|---|---|---|
| Hardpoints | ||||
| Medium 1 | 2D Mining Laser (Fixed) | 2D Mining Laser (Fixed) | (No blueprint available) | Size-2 mining laser fills the medium mount — your main ore-extraction beam; mining tools gain little from engineering, so it stays stock. |
| Medium 2 | — | 2B Sub Surface Displacement Missile (Fixed) | (No blueprint available) | Sub-surface Displacement Missile cracks sub-surface deposits; left stock — mining tools aren't meaningfully engineered. |
| Small 1 | — | 1D Abrasion Blaster (Fixed) | (No blueprint available) | Abrasion Blaster knocks surface deposits off motherlodes for the collectors to scoop; stock by design. |
| Small 2 | — | 1D Mining Laser (Fixed) | (No blueprint available) | Second mining laser, size-1 on the small mount, adds extraction rate; left stock. |
| Utility Mounts | ||||
| Utility 1 | — | 0C Pulse Wave Analyser | (No blueprint available) | Pulse Wave Analyser lights up cores and deposits across the ring; a utility scanner with no blueprint. |
| Utility 2 | — | 0A Shield Booster | G5 Heavy Duty + Super Capacitors | Shield Booster stacks onto the bi-weave; Heavy Duty multiplies its raw MJ so you tank ring hazards while the SLF fights. |
| Utility 3 | — | 0I Heat Sink Launcher | G1 Ammo Capacity (no experimental effect) | Optional / low-priority — Ammo Capacity adds heat-sink charges. Dumps heat for silent running and Thermal-Vent resets. |
| Core Internals | ||||
| Bulkheads | Lightweight Alloy | Lightweight Alloy | G5 Lightweight (no experimental effect) | |
| Power Plant | 4E Power Plant | 4A Power Plant | G5 Low Emissions + Thermal Spread | A-rate to run the fighter bay, lasers, limpets and shield together; Low Emissions cuts heat and signature, Thermal Spread bleeds still more. |
| Thrusters | 4E Thrusters | 4A Thrusters | G5 Dirty Drive Tuning + Drag Drives | A-rated + Dirty Drives give the speed to reposition in the ring and break interdictions. |
| Frame Shift Drive | 4E Frame Shift Drive | 4A Frame Shift Drive | G5 Increased Range + Mass Manager | A-rated + Increased Range reaches hotspot rings and hauls ore home; Mass Manager stretches the laden jump. |
| Life Support | 1E Life Support | 1D Life Support | G5 Lightweight (no experimental effect) | D-rate this size-1 slot to save mass; Lightweight trims more — life support has no experimental effect. |
| Power Distributor | 3E Power Distributor | 3A Power Distributor | G3 Engine Focused + Cluster Capacitors | A-rate for sustained laser and limpet draw; Engine Focused favours boost to escape, since the SLF does the fighting. |
| Sensors | 2E Sensors | 2D Sensors | G5 Lightweight (no experimental effect) | D-rate and go Lightweight — mining needs no sensor range, so save the mass. |
| Fuel Tank | 4C Fuel Tank | 4C Fuel Tank | (No blueprint available) | Stock C tank; fuel capacity is fixed and cannot be engineered. |
| Optional Internals | ||||
| Size 5 | 5E Cargo Rack | 5D Fighter Hangar | (No blueprint available) | Fighter Hangar is the Keelback's whole point — launch an SLF to drive off pirates while you mine; hangars aren't engineerable. |
| Size 5 | 5E Cargo Rack | 5E Cargo Rack | (No blueprint available) | Optional — adds cargo space; worth it for dedicated haulers. Cargo racks aren't engineerable. |
| Size 4 | — | 4A Refinery | G5 Shielded (no experimental effect) | Optional / low-priority — Shielded hardens the refinery. Processes mined fragments. |
| Size 3 | — | 3C Bi-Weave Shield Generator | G5 Reinforced + Fast Charge | Bi-Weave to survive ring hazards and pirate fire while the SLF fights; Reinforced for buffer, Fast Charge to recover quickly. |
| Size 2 | — | 1A Collector Limpet Controller | G5 Lightweight (no experimental effect) | Optional / low-priority — Lightweight trims the controller's mass. Deploys collector limpets. |
| Size 2 | — | 1A Prospector Limpet Controller | G5 Lightweight (no experimental effect) | Optional / low-priority — Lightweight trims the controller's mass. Deploys prospector limpets. |
| Size 1 | — | 1I Detailed Surface Scanner | (No blueprint available) | Optional / low-priority — Expanded Probe Scanning widens probe coverage. Maps planets for exploration data. |
| Open in planner / Export | ||||
| Open in Coriolis | open | open | open | One-click open at coriolis.io. |
| Open in EDSY | open | open | open | One-click open at edsy.org. |
| Copy SLEF | Copies the raw Ship Loadout Export Format for that state. | |||
The fighter hangar is the Keelback's reason to mine — deploy an SLF to drive off pirates while you work the ring. That leaves a small ore hold, refinery and limpet controllers; per-trip hauls are modest, but you survive the rings that kill cheaper miners.
Buy the hull (~2.95M Cr) and fit only what the buy-only column carries: a single 2D Mining Laser (Fixed) on a medium mount and two 5E Cargo Racks for ore. The hull ships with stock Lightweight Alloy bulkheads — no armour spend on a budget miner. Core internals stay stock E-rated — plant, thrusters, FSD, distributor and sensors — on a 4C fuel tank.
Every other slot is deliberately left empty at this stage. The fighter hangar, refinery, collector and prospector limpet controllers, bi-weave shield, second mining laser, sub-surface missile, abrasion blaster and utility scanners all wait for the A-rated pass.
This is a hull-and-a-laser starting point: you can scrape ore, but you can't yet refine, defend, or run the fighter bay that gives the Keelback its purpose.
A-rating priority for a defended budget miner (bulkheads stay stock Lightweight Alloy — a miner pays for tools, not plating):
The fighter bay plus mining lasers and limpets are power-hungry on a small hull — A-rate the plant so the whole defended-mining suite runs at once.
Mining engineering is light and targets the ship, not the tools. Felicity Farseer (maxed) carries the FSD; pin blueprints for remote G1→G5 application.
| Module | Blueprint | Experimental | Engineer |
|---|---|---|---|
| Power Plant (4) | Low Emissions (G5) | Thermal Spread | Hera Tani |
| Power Distributor (3) | Engine Focused (G3) | — | The Dweller |
| Frame Shift Drive (4) | Increased Range (G5) | Mass Manager | Felicity Farseer |
| Thrusters (4) | Dirty Drive Tuning (G5) | Drag Drives | Professor Palin / Mel Brandon |
| Bi-Weave Shield (3) | Reinforced (G5) | Fast Charge | Lei Cheung |
| Shield Booster | Heavy Duty (G5) | Super Capacitors | Didi Vatermann |
| Bulkheads | Lightweight (G5) | — | Selene Jean |
Light — ship mobility and defence blueprints only; mining tools stay stock. With a complete inventory this is spend, not farm. Ask for exact per-blueprint counts if needed.
Approximate progression across the three states (figures are representative, not exact rolls):
| Stat | Initial | A-rated | Engineered |
|---|---|---|---|
| Ore per trip (t) | ~40 | ~60 | ~70 |
| Self-defence | None | SLF | SLF |
| Laden jump (LY) | ~16 | ~24 | ~30 |
| Speed (boost) | 303 m/s | 303 m/s | ~340 m/s |
| Ore-per-credit | poor | poor | poor |
Engineered, the Keelback mines a modest ~70t hold but can launch a fighter to defend it — a cheap miner that survives the rings that kill plain budget haulers. The bulkheads stay Lightweight Alloy, rolled G5 Lightweight Armour to shave hull mass — that mass saving, not added plating, is what feeds the ~30 LY laden jump and ~340 m/s boost. Its ore-per-credit is poor; the SLF is the entire reason to choose it over a bigger-hold miner.
Any reasonably rich ring, including pirate-prone ones, suits a fighter-defended Keelback. From your home base it's a cheap way to mine with a measure of self-defence.
The Keelback is the defended budget miner: a cheap mining hull with a ship-launched fighter bay, unique at its price. Its ore hold is small — the fighter and tools crowd out cargo — so as pure throughput it's poor value. But for a budget miner that can deploy a fighter rather than die laden in a pirate-prone ring, the Keelback's one trick gives it a genuine, if narrow, niche.
Figures on this page are verified against the sources below.