Top speed / boost
245 / 337 m/s
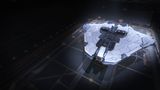
One of the two or three best medium combat ships in the game. Three large hardpoints, a fighter bay and nine optional internals deliver heavy guns, flexible tanking and a force multiplier most mediums can't field — all from a medium pad with no rank gate. It trades a sliver of the Fer-de-Lance's duelling agility and the Python Mk II's raw alpha for unmatched all-round balance and the range to reach any fight.
This ship's 1–100 suitability rating reflects its fully-engineered fit for this role, scored against every ship in the role. See how ships are rated.
The Krait Mk II is Faulcon DeLacy's answer to 'what medium should I fight in?' and the answer most veterans give. Three large hardpoints headline a loadout backed by two mediums; four utilities carry a full defensive suite; and nine optional internals give room to shield-tank or hull-tank as hard as the build demands.
Its signature trick is the ship-launched fighter bay. Deploy an SLF and you split enemy fire, add a second damage source and gain a remote pair of eyes — a force multiplier most mediums can't field. Combined with strong internals and a usable jump range, the Krait Mk II is the medium that turns up to every fight prepared and leaves most of them ahead.
High-intensity conflict zones, Hazardous RES, pirate massacres, Thargoid AX work and wing combat — anywhere balance, an SLF and deep tanking matter more than pure duelling agility.
Four things make the Krait Mk II a top-tier combat medium:
The Fer-de-Lance out-turns it in a pure duel and the Python Mk II carries a fourth large hardpoint; large warships out-tank and out-gun it outright. The Krait's case isn't peak anything — it's that the combination of guns, fighter bay, tanking and range has no weak link, which makes it the safest top-tier medium pick.
Three large plus two medium hardpoints, nine optional internals and an SLF bay give it large-ship combat reach from a no-rank medium pad; only its class-6 distributor and non-elite turning hold it short of perfect.
The 90/100 headline is a verdict against the combat role's priority-ordered factors. Each factor carries a weight (its share of 100); this hull earns part of each based on how it performs against the whole field. The points sum to the rating.
| Role factor | Score | Why this score |
|---|---|---|
| Hardpoints | 29/30 | 3 Large + 2 Medium mounts are a heavy main battery for a medium hull, enough alpha and sustained fire for any RES or CZ. Only the Python Mk II (4L) and Fer-de-Lance's huge mount out-class it among mediums. |
| Power distributor | 8/10 | The class-6 power distributor is the one genuine weak point: feeding three large guns plus boost taxes it hard, which is why A-rating it is the first priority. Adequate when engineered Charge Enhanced, but not the strength of larger hulls. |
| Shield | 13/15 | Base ~262 MJ scales past ~1,000 MJ engineered via a Reinforced bi-weave plus two Heavy-Duty boosters across 4 utility mounts and deep internals. Strong for a medium, though large hulls field far more raw shield. |
| Armour & internals | 14/15 | 396 base armour reaches ~2,000+ effective with Heavy-Duty HRPs, and the nine optional internals (6·6·5·5·4·3·3·2·1) are class-leading depth for a medium — room for cells, reinforcement, an SLF bay and module reinforcement together. |
| Agility | 17/20 | 245/337 m/s on a 320t hull stays controllable with Dirty Drives, but the Fer-de-Lance and Mamba out-turn it outright. Good enough to hold range, not a duelling chassis. |
| Utility & flexibility | 9/10 | 4 utility mounts, a ship-launched fighter bay most mediums lack, a medium pad with no rank or permit gate, and nine optionals supporting either shield- or hull-tank make it the most flexible top-tier combat medium. |
| Weighted total | 90/100 | Matches the headline suitability rating for this ship in this role. |
Weights are an editorial decomposition of the role's stated priority order — not an in-game formula. Bar length shows how fully each factor is earned; the longest factors carried the score, the shortest are where it gave points away. See how ships are rated.
Both tables rate ships for the combat role specifically. The role column is the hardpoint loadout — the raw weapon mounts behind the damage.
| Ship | Class | Hardpoints | Pros & cons vs Krait Mk II | Rating |
|---|---|---|---|---|
| Fer-de-Lance | Medium | 1H 4M | Huge hardpoint, best duelling agilityTiny internals, no SLF, short range | 93 |
| Python Mk II | Medium | 4L 2M | Four large hardpoints; superb sustained DPSOnly six optionals; no SLF; pricier | 90 |
| Krait Mk II this | Medium | 3L 2M | — this hull (baseline) | 90 |
| Mamba | Medium | 1H 2L 2S | Fastest medium; brutal alpha strikePoor agility; no SLF; narrow build window | 89 |
| Alliance Chieftain | Medium | 2L 1M 3S | Superb agility; tough; great AX hullLower DPS ceiling; no SLF | 88 |
| Alliance Challenger | Medium | 1L 3M 3S | Tankiest Alliance hull; many hardpointsSlower; less alpha | 86 |
| Corsair | Medium | 3L 3M | Six guns; modern; strong all-rounderNo SLF; newer build knowledge maturing | 85 |
| Federal Assault Ship | Medium | 2L 2M | Fast, agile, tough Federal brawlerFewer/smaller guns; Federal rank gate | 84 |
| Python | Medium | 3L 2M | Versatile; roomy; can also haul and mineLess focused; lower combat ceiling | 83 |
| Federal Gunship | Medium | 1L 4M 2S | Seven hardpoints; very tough turret boatSluggish; Federal rank gate | 82 |
In the medium combat class the Krait Mk II is the balanced benchmark. The Fer-de-Lance and Python Mk II edge it on duelling and alpha respectively, but neither matches its blend of heavy guns, a fighter bay, deep tanking and range. For all-round PvE combat it's the safest top-tier choice.
| Ship | Class | Hardpoints | Pros & cons vs Krait Mk II | Rating |
|---|---|---|---|---|
| Federal Corvette | Large | 2H 1L 2M 2S | The combat apex — firepower and tank without peerFederal Rear Admiral rank; ~187M Cr; large pad | 98 |
| Imperial Cutter | Large | 1H 2L 4M | Vast shields; brutal when built for warImperial rank; turns like a moon; large pad | 91 |
| Anaconda | Large | 1H 3L 2M 2S | Eight hardpoints; vast internals; does everythingPonderous; costly to engineer | 88 |
| Vulture | Small | 2L | Small-pad agility with two large gunsFar less firepower, tank and endurance | 80 |
| Type-10 Defender | Large | 4L 3M 2S | Turret platform; superb AX; very toughSlow and unwieldy in normal combat | 78 |
Stepping up means a large pad and usually a rank grind. The Corvette and Cutter out-tank and out-gun the Krait outright; until you've earned them, the Krait Mk II delivers most of a large warship's capability from a medium pad, complete with a fighter bay neither large ship needs.
At ~44M Cr the Krait Mk II is mid-priced for a top-tier combat medium, with no rank or permit gate. Its deep internals mean a full combat fit — shield, cell banks, reinforcement, SLF bay — adds up, but the all-in cost stays well below a rank-gated large warship.
The fighter bay is the one optional that earns its slot many times over in extended fights; budget for an SLF and a good NPC pilot alongside the usual A-rating and engineering.
Like the Python Mk II, the Krait asks only for credits — no Federal or Imperial grind. It's the most accessible balanced warship in the game.
A balanced shield-tank combat fit with an SLF bay. Initial is buy-only; A-rated is the combat-ready baseline; Engineered applies the house combat pattern. Swap a cell bank for more reinforcement to lean hull-tank instead.
| Slot | Initial · buy-only | A-Rated · no eng | Engineered | Notes |
|---|---|---|---|---|
| Hardpoints | ||||
| Large 1 | 3E Pulse Laser (Gimballed) | 3C Multi-Cannon (Gimballed) | G5 Overcharged + Corrosive Shell | Primary large mount; the single Corrosive Shell strips armour resistance for the whole battery. |
| Large 2 | 3C Multi-Cannon (Gimballed) | 3C Multi-Cannon (Gimballed) | G5 Overcharged + Auto Loader | Second large multi-cannon; Auto Loader removes reloads so it never stops firing. |
| Large 3 | 3C Multi-Cannon (Gimballed) | 3C Beam Laser (Gimballed) | G5 Efficient + Thermal Vent | Large beam for shield-stripping; Thermal Vent vents heat so it runs cold under sustained fire. |
| Medium 1 | 2F Multi-Cannon (Gimballed) | 2F Multi-Cannon (Gimballed) | G5 Overcharged + Auto Loader | Medium multi-cannon adds sustained kinetic DPS; Auto Loader keeps it topped up. |
| Medium 2 | 2F Pulse Laser (Gimballed) | 2D Beam Laser (Gimballed) | G5 Efficient + Thermal Vent | Buy a cheap pulse, swap to a Thermal-Vent beam once A-rated for heat-free shield work. |
| Utility Mounts | ||||
| Utility 1 | 0A Shield Booster | 0A Shield Booster | G5 Heavy Duty + Super Capacitors | First shield booster; Heavy Duty multiplies the bi-weave's raw MJ. |
| Utility 2 | — | 0A Shield Booster | G5 Heavy Duty + Super Capacitors | Second Heavy-Duty booster — the cheapest large gain in shield strength. |
| Utility 3 | — | 0I Chaff Launcher | G1 Ammo Capacity (no experimental effect) | Optional / low-priority — Ammo Capacity adds chaff salvos. Chaff spoils gimballed and turreted fire. |
| Utility 4 | — | 0I Heat Sink Launcher | G1 Ammo Capacity (no experimental effect) | Optional / low-priority — Ammo Capacity adds heat-sink charges. Dumps heat for silent running and Thermal-Vent resets. |
| Core Internals | ||||
| Bulkheads | Lightweight Alloy | Military Grade Composite | G5 Heavy Duty + Deep Plating | |
| Power Plant | 7E Power Plant | 7A Power Plant | G5 Overcharged + Thermal Spread | Powers three large guns, an SLF, shields and cells; Overcharged adds headroom, Thermal Spread bleeds the extra heat. |
| Thrusters | 6E Thrusters | 6A Thrusters | G5 Dirty Drive Tuning + Drag Drives | A-rated + Dirty Drives keep a 320t hull agile enough to control range. |
| Frame Shift Drive | 5E Frame Shift Drive | 5A Frame Shift Drive | G3 Increased Range (no experimental effect) | A-rated to reach fights and turn-ins; only G3 range — combat doesn't need a jump monster. |
| Life Support | 4E Life Support | 4D Life Support | G5 Lightweight (no experimental effect) | D-rate to save mass, Lightweight trims more; life support has no experimental effect. |
| Power Distributor | 7E Power Distributor | 7A Power Distributor | G5 Charge Enhanced + Super Conduits | A-rate this FIRST — three large guns plus boost drain the class-7 distributor faster than anything else. |
| Sensors | 6E Sensors | 6D Sensors | G5 Lightweight (no experimental effect) | Drop to D and go Lightweight; combat needs no sensor range, so save the mass. |
| Fuel Tank | 5C Fuel Tank | 5C Fuel Tank | (No blueprint available) | Stock tank; fuel capacity is fixed and cannot be engineered. |
| Optional Internals | ||||
| Size 6 | 6E Shield Generator | 6D Fighter Hangar | (No blueprint available) | SLF bay adds a second gun platform that draws fire; hangars are not engineerable. |
| Size 6 | 6E Cargo Rack | 6C Bi-Weave Shield Generator | G5 Reinforced + Fast Charge | Bi-weave regenerates fast under fire; Reinforced maximises its MJ and Fast Charge speeds the recharge. |
| Size 5 | — | 5A Shield Cell Bank | G4 Specialised (no experimental effect) | Optional / low-priority — Specialised cuts the cell bank's heat and power spike. Burst shield healing for emergencies. |
| Size 5 | — | 5D Hull Reinforcement | G5 Heavy Duty + Deep Plating | Heavy-Duty hull reinforcement is the cheapest large multiplier on effective armour. |
| Size 4 | — | 4D Hull Reinforcement | G5 Heavy Duty + Deep Plating | Second Heavy-Duty HRP — armour stacks linearly across the deep internals. |
| Size 3 | — | 3A Shield Cell Bank | G4 Specialised (no experimental effect) | Optional / low-priority — Specialised cuts the cell bank's heat and power spike. Burst shield healing for emergencies. |
| Size 3 | — | 3D Module Reinforcement | (No blueprint available) | Module Reinforcement spreads penetrating-hit damage across internals; not engineerable. |
| Size 2 | — | 2D Module Reinforcement | (No blueprint available) | More internal protection for the modules that keep you flying; not engineerable. |
| Size 1 | — | 1D Module Reinforcement | (No blueprint available) | Optional / low-priority — Expanded Probe Scanning widens probe coverage. Maps planets for exploration data. |
| Open in planner / Export | ||||
| Open in Coriolis | open | open | open | One-click open at coriolis.io. |
| Open in EDSY | open | open | open | One-click open at edsy.org. |
| Copy SLEF | Copies the raw Ship Loadout Export Format for that state. | |||
An SLF splits enemy fire and adds a second gun — in long CZ and AX fights it's worth more than another reinforcement. Pair it with a good NPC pilot or a multicrew friend.
Buy the hull and fit a stock 6E Shield Generator in the larger class-6 bay, backed by a single 0A Shield Booster — RES-ready immediately. Bulkheads stay at stock Lightweight Alloy and the core internals all go in at base E-rating.
Arm the three large mounts with gimballed weapons — two multi-cannons and a pulse laser — and the two mediums with a multi-cannon and a pulse laser.
Everything else stays empty for now: the second class-6 bay carries a cheap cargo rack, while the fighter bay, the other three utilities, the shield cell banks and the hull/module reinforcement all wait for the A-rated pass.
A-rating priority for a balanced combat medium:
Three large hardpoints plus a fighter bay demand power and distribution before anything else; A-rate those before touching the bulkhead or weapon blueprints.
The full house combat pattern on a balanced medium. Pin blueprints for remote G1→G5 application; visit in person for experimentals (Corrosive Shell, Thermal Vent, Fast Charge).
| Module | Blueprint | Experimental | Engineer |
|---|---|---|---|
| Power Plant (7) | Overcharged (G5) | Thermal Spread | Hera Tani |
| Thrusters (6) | Dirty Drive Tuning (G5) | Drag Drives | Professor Palin / Mel Brandon |
| Multi-Cannons | Overcharged (G5) | Corrosive Shell (one) / Auto Loader (rest) | Tod McQuinn |
| Beam Lasers | Efficient (G5) | Thermal Vent | Broo Tarquin |
| Power Distributor (7) | Charge Enhanced (G5) | Super Conduits | The Dweller |
| Bi-Weave Shield (6) | Reinforced (G5) | Fast Charge | Lei Cheung |
| Shield Boosters | Heavy Duty (G5) | Super Capacitors | Didi Vatermann |
| Bulkheads | Heavy Duty (G5) | Deep Plating | Selene Jean |
| Hull Reinforcement | Heavy Duty (G5) | Deep Plating | Selene Jean |
Material-heavy — G5 across plant, thrusters, distributor, weapons and defences. With a complete inventory this is engineering-spend, not farming. Ask for exact per-blueprint counts to verify reserves.
Approximate progression across the three states (figures are representative, not exact rolls):
| Stat | Initial | A-rated | Engineered |
|---|---|---|---|
| Top speed (boost) | 337 m/s | 337 m/s | ~400 m/s |
| Shield (MJ) | ~370 | ~520 | ~1,000+ |
| Armour (eff.) | 396 | ~800 | ~2,000+ |
| Sustained DPS | high | very high | elite |
| Force multiplier | none | SLF | SLF + tank |
The Military Grade Composite bulkhead and twin hull reinforcements lift effective armour from the A-rated pass onward; engineered, the Krait doubles shields, multiplies effective armour several-fold and sustains three large hardpoints plus a fighter indefinitely — large-ship combat capability from a medium pad, with a force multiplier the big ships skip.
Any system with a Haz RES and active conflict zones suits it. It pairs naturally with your Imperial-rank grind — CZ and massacre payouts double as standing progress.
The Krait Mk II is the medium warship with no weak link: heavy guns, a fighter bay, deep tanking and the range to get to the fight, all from a medium pad and with no rank gate. The Fer-de-Lance duels better and the Python Mk II hits harder, but nothing matches the Krait's all-round combat completeness. It's the safe, superb default.
Figures on this page are verified against the sources below.