Top speed / boost
179 / 219 m/s (very slow)
A specialist turret-and-tank platform with a clear niche. Glacial speed and feeble shields cap its rating for general combat, but nine mounts and the highest armour in the game make it nearly indestructible as a turret boat. Its true calling is AX, where hardpoint count and toughness are the deciding factors.
This ship's 1–100 suitability rating reflects its fully-engineered fit for this role, scored against every ship in the role. See how ships are rated.
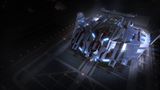
The Type-10 Defender is Lakon's bulk-freighter chassis reborn as a warship — and the result is the toughest hull in the game. It carries nine hardpoints (four large, three medium, two small), two military slots, eight utilities and the single highest armour base of any ship (1044), all wrapped around a slow, immense airframe built to sit in a fight and simply not die.
It is the antithesis of a duellist. The Type-10 is glacially slow, turns terribly and has surprisingly weak shields for its size — so it doesn't dodge or chase; it anchors and saturates, loaded with turrets that fire on everything around it while its armour soaks the return. That profile makes it a famous anti-Thargoid platform: nine mounts of AX weaponry on a hull that survives interceptor attacks. As a turret tank, nothing is harder to kill.
Turret-saturation and AX combat: holding the line in conflict zones, anti-Thargoid engagements (its signature role), and any fight where being nearly indestructible and out-gunning everything around you beats moving.
Four things make the Type-10 the ultimate turret tank:
It is brutally slow, turns dreadfully, and — oddly for a tank — has feeble shields, so it relies almost entirely on armour. It cannot chase, dodge, escape or hold guns on an agile target manually (hence turrets). For general PvE it's outclassed by faster, harder-hitting ships; its niche is turret saturation and, above all, AX, where its toughness and mount count are ideal.
Nine mounts and game-highest armour lead the score; the limiter is glacial 179/219 m/s agility plus feeble ~99 MJ shields, capping it as a stand-and-saturate specialist.
The 78/100 headline is a verdict against the combat role's priority-ordered factors. Each factor carries a weight (its share of 100); this hull earns part of each based on how it performs against the whole field. The points sum to the rating.
| Role factor | Score | Why this score |
|---|---|---|
| Hardpoints | 30/30 | Nine hardpoints (4 Large, 3 Medium, 2 Small) is the highest mount count of any combat hull, ideal for turret saturation. The ceiling is no Huge mount, so peak alpha trails the Corvette's 2H and Cutter's 1H burst. |
| Power distributor | 9/10 | Class-7 distributor must feed nine turrets, a fighter and eight utilities; A-rated it sustains turret fire adequately but sits a class below the Corvette/Cutter capital distributors. Lower draw from turrets keeps it serviceable, not class-leading. |
| Shield | 8/15 | Base shield is ~99 MJ — feeble for a 1,200 t hull and explicitly its oddest weakness. Even with bi-weave plus three Heavy-Duty boosters it reaches only ~430 MJ, far below the Cutter; the shield is a buffer, not the tank. |
| Armour & internals | 15/15 | 1,044 base armour is the single highest in the game, climbing past ~6,000 effective with two military slots plus deep optional HRP stacking. Module reinforcement across internals makes it the most survivable hull in the role — outright role-leading. |
| Agility | 6/20 | 179 / 219 m/s on a 1,200 t hull with very poor handling is worst-in-class; even Dirty Drives reach only ~270 m/s boost. It cannot chase, dodge, escape or hold fixed guns on agile targets — the dominant drag on the score. |
| Utility & flexibility | 10/10 | Eight utility mounts is the largest suite in the game, fitting triple shield boosters, dual point defence, heat sinks and chaff alongside a 4-crew SLF bay. No rank gate adds access flexibility; the turret-only constraint slightly narrows weapon versatility. |
| Weighted total | 78/100 | Matches the headline suitability rating for this ship in this role. |
Weights are an editorial decomposition of the role's stated priority order — not an in-game formula. Bar length shows how fully each factor is earned; the longest factors carried the score, the shortest are where it gave points away. See how ships are rated.
Both tables rate ships for the combat role specifically. The role column is the hardpoint loadout — the raw weapon mounts behind the damage.
| Ship | Class | Hardpoints | Pros & cons vs Type-10 Defender | Rating |
|---|---|---|---|---|
| Federal Corvette | Large | 2H 1L 2M 2S | Two huge mounts; agile; apex firepowerFederal rank; ~187M Cr; far less armour | 98 |
| Imperial Cutter | Large | 1H 2L 4M | Best shields; huge mount; far fasterImperial rank; less armour | 91 |
| Anaconda | Large | 1H 3L 2M 2S | Eight mounts; vast internals; faster; no rankLess armour; lower mount count | 88 |
| Imperial Clipper | Large | 2L 2M | Far faster and more agileOnly four mounts; far less tank | 79 |
| Type-10 Defender this | Large | 4L 3M 2S | — this hull (baseline) | 78 |
The Type-10 is the armour-and-saturation specialist of the large class. The others out-gun, out-shield or out-run it, but none can match its armour or its nine mounts. As a stand-and-saturate turret tank — especially for AX — it occupies a niche the faster, harder-hitting warships simply don't fill.
| Ship | Class | Hardpoints | Pros & cons vs Type-10 Defender | Rating |
|---|---|---|---|---|
| Krait Mk II | Medium | 3L 2M | Agile AX medium; SLF; medium padFar less tank for sustained AX | 90 |
| Anaconda | Large | 1H 3L 2M 2S | Tanky AX-capable capital; no rank; fasterLess raw armour | 88 |
| Alliance Chieftain | Medium | 2L 1M 3S | Agile AX medium; cheap; no rankFar less tank; fewer mounts | 88 |
| Alliance Challenger | Medium | 1L 3M 3S | Tough; agile; medium pad; no rankFar less armour and mounts | 86 |
| Federal Gunship | Medium | 1L 4M 2S | The medium turret tank; cheaper; class-7 distributorLess armour and mounts; Federal rank | 82 |
For AX specifically the agile mediums (Chieftain, Krait Mk II) dodge Thargoid attacks the Type-10 must simply tank, and many pilots prefer them. But for a stationary, indestructible AX gun platform that out-lasts everything, the Type-10 is unrivalled — the choice when survivability and mount count beat mobility.
At ~121M Cr the Type-10 is a major purchase but carries no rank gate — the most accessible heavy-tank warship. A turret-and-armour fit doesn't need expensive duelling engineering, so the bill is dominated by the hull, nine weapons and deep reinforcement.
It's most worth the cost for dedicated AX pilots and wing tanks; for general combat, faster and harder-hitting ships offer more per credit. Buy it for what it uniquely does — survive and saturate.
The Type-10 needs only credits — the cheapest route to the toughest hull in the game. Buy it for AX and turret-tanking, not for chasing or duelling.
Lakon offers a Type-10 'AX Combat' themed pre-built in some storefronts, aligned to its anti-Thargoid strength. The standard pre-built rules apply: stock modules sell for 0 Cr and cannot be stored or transferred, but engineering the stock cores in place preserves the free rebuy.
If you fly a pre-built, add AX/Guardian weapons and reinforcement to open slots and engineer the cores in situ — never strip the stock modules out.
| Package | Type-10 Defender (AX-themed pre-built, where offered) |
|---|---|
| Theme | Anti-Thargoid (AX) combat |
The Type-10's armour and nine mounts make it a natural AX platform — an AX-themed pre-built plays directly to its strength. Build the AX kit into open slots and keep the rebuy free.
A turret-saturation armour-tank fit using both military slots and all eight utilities. Initial is buy-only; A-rated is the combat-ready baseline; Engineered applies the house combat pattern weighted to turrets and armour. An AX variant swaps the turrets for Guardian/AX weapons.
| Slot | Initial · buy-only | A-Rated · no eng | Engineered | Notes |
|---|---|---|---|---|
| Hardpoints | ||||
| Large 1 | 3C Multi-Cannon (Gimballed) | 3E Multi-Cannon (Turreted) | G5 Overcharged + Corrosive Shell | Lead large multi-cannon turret; the single Corrosive Shell strips armour resistance for the whole battery. |
| Large 2 | 3C Multi-Cannon (Gimballed) | 3E Multi-Cannon (Turreted) | G5 Overcharged + Auto Loader | Second large MC turret; Auto Loader removes reloads so it tracks and fires nonstop. |
| Large 3 | 3E Pulse Laser (Gimballed) | 3D Beam Laser (Turreted) | G5 Efficient + Thermal Vent | Large beam turret for shield-stripping; Thermal Vent keeps it cold under sustained fire. |
| Large 4 | 3E Pulse Laser (Gimballed) | 3D Beam Laser (Turreted) | G5 Efficient + Thermal Vent | Second large beam turret; paired Thermal-Vent beams hold targets shieldless while the MCs work the hull. |
| Medium 1 | 2F Multi-Cannon (Gimballed) | 2F Multi-Cannon (Turreted) | G5 Overcharged + Auto Loader | Medium MC turret adds sustained kinetic DPS; Auto Loader keeps it uninterrupted. |
| Medium 2 | 2F Multi-Cannon (Gimballed) | 2F Multi-Cannon (Turreted) | G5 Overcharged + Auto Loader | Second medium MC turret; turrets let the fortress fight while you manage position. |
| Medium 3 | 2F Pulse Laser (Gimballed) | 2E Beam Laser (Turreted) | G5 Efficient + Thermal Vent | Medium beam turret; Thermal Vent vents heat so the laser battery runs heat-free. |
| Small 1 | — | 1G Multi-Cannon (Turreted) | G5 Overcharged + Auto Loader | Small MC turret fills the firing arcs; Auto Loader keeps it topped up. |
| Small 2 | — | 1G Multi-Cannon (Turreted) | G5 Overcharged + Auto Loader | Second small MC turret completes nine-mount saturation coverage. |
| Utility Mounts | ||||
| Utility 1 | 0A Shield Booster | 0A Shield Booster | G5 Heavy Duty + Super Capacitors | First Heavy-Duty shield booster; multiplies the bi-weave's raw MJ buffer. |
| Utility 2 | — | 0A Shield Booster | G5 Heavy Duty + Super Capacitors | Second Heavy-Duty booster — cheap shield-buffer gain over the armour. |
| Utility 3 | — | 0I Heat Sink Launcher | G1 Ammo Capacity (no experimental effect) | Optional / low-priority — Ammo Capacity adds heat-sink charges. Dumps heat for silent running and Thermal-Vent resets. |
| Utility 4 | — | 0I Heat Sink Launcher | G1 Ammo Capacity (no experimental effect) | Optional / low-priority — Ammo Capacity adds heat-sink charges. Dumps heat for silent running and Thermal-Vent resets. |
| Utility 5 | — | 0I Point Defence | G1 Ammo Capacity (no experimental effect) | Optional / low-priority — Ammo Capacity adds rounds. Point Defence shoots down incoming missiles and torpedoes. |
| Utility 6 | — | 0I Point Defence | G1 Ammo Capacity (no experimental effect) | Optional / low-priority — Ammo Capacity adds rounds. Point Defence shoots down incoming missiles and torpedoes. |
| Utility 7 | — | 0I Chaff Launcher | G1 Ammo Capacity (no experimental effect) | Optional / low-priority — Ammo Capacity adds chaff salvos. Chaff spoils gimballed and turreted fire. |
| Utility 8 | — | 0A Shield Booster | G5 Heavy Duty + Super Capacitors | Third Heavy-Duty booster rounds out the shield buffer. |
| Core Internals | ||||
| Bulkheads | Lightweight Alloy | Military Grade Composite | G5 Heavy Duty + Deep Plating | |
| Power Plant | 8E Power Plant | 8A Power Plant | G5 Overcharged + Thermal Spread | Powers nine turrets, an SLF and eight utilities; Overcharged adds headroom, Thermal Spread bleeds the extra heat. |
| Thrusters | 7E Thrusters | 7A Thrusters | G5 Dirty Drive Tuning + Drag Drives | A-rated + Dirty Drives recover the barest mobility a 1,200t hull allows. |
| Frame Shift Drive | 7E Frame Shift Drive | 7A Frame Shift Drive | G3 Increased Range + Mass Manager | A-rated to relocate the fortress between fights; only G3 range — combat doesn't need a jump monster. |
| Life Support | 5E Life Support | 5D Life Support | G5 Lightweight (no experimental effect) | D-rate to save mass, Lightweight trims more; life support has no experimental effect. |
| Power Distributor | 7E Power Distributor | 7A Power Distributor | G5 Charge Enhanced + Super Conduits | A-rate to feed nine turrets without throttling; Charge Enhanced widens the weapon capacitor. |
| Sensors | 4E Sensors | 4D Sensors | G5 Lightweight (no experimental effect) | Drop to D and go Lightweight; combat needs no sensor range, so save the mass. |
| Fuel Tank | 6C Fuel Tank | 6C Fuel Tank | (No blueprint available) | Stock tank; fuel capacity is fixed and cannot be engineered. |
| Military Slots | ||||
| Military 1 | 5D Hull Reinforcement | 5D Hull Reinforcement | G5 Heavy Duty + Deep Plating | Heavy-Duty hull reinforcement is the cheapest large multiplier on effective armour. |
| Military 2 | — | 5D Module Reinforcement | (No blueprint available) | Module Reinforcement spreads penetrating-hit damage across internals; not engineerable. |
| Optional Internals | ||||
| Size 8 | 8E Shield Generator | 8C Bi-Weave Shield Generator | G5 Reinforced + Fast Charge | Bi-weave regenerates fast under fire; Reinforced maximises the MJ buffer, Fast Charge keeps regen high. |
| Size 7 | 7E Cargo Rack | 5D Hull Reinforcement | G5 Heavy Duty + Deep Plating | Hull reinforcement caps at size 5, so a 5D HRP under-fills this size-7 slot for max effective armour. |
| Size 6 | — | 6D Fighter Hangar | (No blueprint available) | SLF bay adds a second gun platform that draws fire; hangars are not engineerable. |
| Size 5 | — | 5D Hull Reinforcement | G5 Heavy Duty + Deep Plating | Another Heavy-Duty 5D HRP — armour stacks linearly across the optionals. |
| Size 4 | — | 4D Module Reinforcement | (No blueprint available) | Module Reinforcement protects the cores that keep the fortress flying; not engineerable. |
| Size 4 | — | 4A Shield Cell Bank | G4 Specialised (no experimental effect) | Optional / low-priority — Specialised cuts the cell bank's heat and power spike. Burst shield healing for emergencies. |
| Size 3 | — | 3D Hull Reinforcement | G5 Heavy Duty + Deep Plating | More Heavy-Duty hull where the slot allows. |
| Size 3 | — | 3D Module Reinforcement | (No blueprint available) | More internal protection for the modules; not engineerable. |
| Size 2 | — | 2D Module Reinforcement | (No blueprint available) | Last module reinforcement tops up penetrating-hit protection; not engineerable. |
| Size 1 | — | 1D Hull Reinforcement | G5 Heavy Duty (no experimental effect) | Optional / low-priority — Expanded Probe Scanning widens probe coverage. Maps planets for exploration data. |
| Open in planner / Export | ||||
| Open in Coriolis | open | open | open | One-click open at coriolis.io. |
| Open in EDSY | open | open | open | One-click open at edsy.org. |
| Copy SLEF | Copies the raw Ship Loadout Export Format for that state. | |||
The Type-10 can't aim fixed guns at agile targets, so go full turret — it saturates everything in range while you focus on staying alive. Stack armour and hull reinforcement; the feeble shields are a buffer, not the tank.
Buy the hull with its stock Lightweight Alloy bulkhead and slot a 5D Hull Reinforcement in the first military slot — armour is the whole point. The Military Grade bulkhead, the second military slot and the optional-bay reinforcement stack all arrive with the A-rated pass.
Fit gimballed multi-cannons and pulse lasers across the four large and three medium mounts so the ship fights even while you concentrate on position; the two small hardpoints stay empty until the A-rated turret swap.
Run the stock 8E shield generator with a single shield booster for a thin buffer over the armour; the bi-weave, point defence and heat sinks wait for A-rating. Even unengineered it's a near-immovable anchor.
A-rating priority for a turret tank:
The Type-10 tanks on armour, not shields — swap to Military Grade bulkheads and reinforce the hull heavily, then A-rate plant and distributor to feed nine turrets. Fill the lone size-1 slot with a 1D Hull Reinforcement, not a surface scanner — every internal earns its mass here. Don't waste credits chasing a big shield it can't really use.
The house combat pattern weighted to turrets and armour. Pin blueprints for remote G1→G5 application; visit in person for experimentals.
| Module | Blueprint | Experimental | Engineer |
|---|---|---|---|
| Power Plant (8) | Overcharged (G5) | Thermal Spread | Hera Tani |
| Thrusters (7) | Dirty Drive Tuning (G5) | Drag Drives | Professor Palin / Mel Brandon |
| Multi-Cannon Turrets | Overcharged (G5) | Corrosive Shell (one) / Auto Loader (rest) | Tod McQuinn |
| Beam Turrets | Efficient (G5) | Thermal Vent | Broo Tarquin |
| Power Distributor (7) | Charge Enhanced (G5) | Super Conduits | The Dweller |
| Bulkheads | Heavy Duty (G5) | Deep Plating | Selene Jean |
| Hull Reinforcement | Heavy Duty (G5) | Deep Plating | Selene Jean |
| Bi-Weave Shield (8) | Reinforced (G5) | Fast Charge | Lei Cheung |
| Shield Boosters | Heavy Duty (G5) | Super Capacitors | Didi Vatermann |
Heavy — nine weapons plus deep armour reinforcement and class-8 cores; a large material spend, though no exotic shield work needed. With a complete inventory it's spend, not farm. Ask for exact per-blueprint counts before committing.
Approximate progression across the three states (figures are representative, not exact rolls):
| Stat | Initial | A-rated | Engineered |
|---|---|---|---|
| Top speed (boost) | 219 m/s | 219 m/s | ~270 m/s |
| Armour (eff.) | 1,044 | ~3,800 | ~6,200+ |
| Shield (MJ) | ~140 | ~200 | ~430 |
| Total firepower | very high | very high | elite (nine mounts) |
| Agility | very poor | very poor | very poor |
The A-rated jump is almost all bulkhead and reinforcement — Military Grade Composite plus the full HRP stack (including the size-1 slot reclaimed from the scanner) lifts effective armour well past 3,500 before a single engineer touches it. Engineered with Heavy Duty + Deep Plating throughout, the Type-10 is the toughest ship in the game — effective armour past 6,000 and nine turrets saturating everything in range. It never becomes fast or nimble; it doesn't try. As an immovable, near-indestructible gun platform — especially for AX — nothing out-lasts it.
Any CZ or Haz RES suits an anchored Type-10; its true home is Thargoid-active systems and AX conflict zones, where armour and nine mounts matter most.
The Type-10 Defender is the flying fortress: the highest armour in the game, nine hardpoints and a near-indestructible turret-tank profile, with no rank gate. It's far too slow and graceless for general combat, but as a stationary saturation platform — and above all as an anti-Thargoid AX tank — nothing out-lasts it. A specialist's fortress, and the best at what it does.
Figures on this page are verified against the sources below.